tmux 使用笔记
tmux new -s name新建名字为 name 的会话(session),等同tmux new-session -s name, 指定名字方便 attach。tmux rename -t session1 session2重命名 session1 为 session2,等同tmux rename-session -t session1 session2。tmux ls列出所有会话,等同tmux list-sessions。tmux at -t nameattach 名字为 name 的会话。tmux at -d重绘窗口,在大小不同屏幕上用 tmux 时候会保持窗口大小为最小尺寸,这个命令就可以重置窗口大小。viatmux kill-session -t name干掉指定名字的会话,关闭会话所有窗口自动会关掉会话。tmux kill-window -t name关闭指定窗口,很少用,一般都是Ctrl-b &关闭本窗口。Ctrl-b d脱离会话回到终端。Ctrl-b [进入复制模式,滚屏查看,支持 vim 上下翻页快捷键。Ctrl-b c新建窗口。Ctrl-b &关闭窗口。set-window-option -g mode-keys vi设置复制模式中键盘布局为 vi。Ctrl-b w列出所有窗口,可用 vim j/k 上下翻页。Ctrl-b : - rename-window重命名窗口。Ctrl-b n/p切换到下一个/前一个窗口,也可以直接用Ctrl-b 数字切换到指定窗口。Ctrl-b %/"分割窗口为面板(panel)。Ctrl-b x关闭面板。Ctrl-b Alt+方向键调整面板大小。Ctrl-b t很酷的一个时钟。
tmux 支持 ~/.tmux.conf 配置文件,推荐设置 set-option -g base-index 1 让窗口从 1 排序,方便数字键切换。更多设置参考 Wiki 使用tmux。
Tmux Plugin Manager,插件管理,推荐 tmux-sensible, tmux-resurrect.
AFNetworking 学习笔记二
AFNetworking 学习笔记 的后续,记录一些 AFN 比较隐蔽的知识点。
AFN 的设计过于理想化
AFN 的架构设计非常棒,使用起来也很简单,但一些设计过于理想化,在实际开发中会有一些条件不能满足,这时候 AFN 就会出现一些“坑”。
1. 缓存策略
NSURLRequest 默认的缓存策略是 NSURLRequestUseProtocolCachePolicy,网络请求是否用缓存是由 HTTP Cache-Control 决定,而在实际开发中由于种种原因(服务端为了简化系统等),接口的缓存时间都设置的非常长或者不准,这种情况下就会出现服务端数据更新但是 AFN 拿到的还是旧数据,因为他直接读的缓存。
得益于 AFN 优秀的架构设计,这个问题也很好解决,继承 AFHTTPClient 然后重写 requestWithMethod:path:parameters::
- (NSMutableURLRequest *)requestWithMethod:(NSString *)method path:(NSString *)path parameters:(NSDictionary *)parameters
{
    NSMutableURLRequest *request = [super requestWithMethod:method path:path parameters:parameters];
    [request setCachePolicy:NSURLRequestReloadIgnoringLocalCacheData];

    return request;
}
2. Response 类型判断
以 AFJSONRequestOperation 为例,只有 Content-Type 是 @"application/json", @"text/json", @"text/javascript" 或 URL pathExtension 是 json 的才会被认为是 JSON 类型,其他都不认。很多服务端接口都没有 Content-Type 返回或者直接丢一个 text/html,请求也不是 json 结尾,但返回内容确实又是 JSON 数据,这时候 AFN 就很无力。
上面这两个问题的根本原因是服务端由于各种各样的问题不能严格按照 HTTP 要求返回正确格式的内容,造成 AFN 无法按照标准去接收解析。责任虽不在客户端开发,但实际开发中确实存在这种情况,这个时候就需要客户端去迂回解决,好在 AFN 的架构设计很容易扩展。
AFN vs ASI
AFN 已经取代 ASIHTTPRequest(ASI) 成为 iOS 开发中首选的网络库,但不能说 AFN 就完胜 ASI,比如这篇 对比iOS网络组件:AFNetworking VS ASIHTTPRequest,AFN 在易用性上胜出,在性能上并没有 ASI 好(因为 ASI 是直接用 CFNetwork 底层而 AFN 是用 NSURLConnection)。
就我自己实际开发来说,AFN 最大的不便是没有 synchronous 请求方式,只支持异步请求。很多时候我们只是想发一个请求,无需返回处理,这种情况下 AFN 这种自定义 HTTPClient 的方式就过于复杂。
最近发现了一个网络库 STHTTPRequest,基于 NSURLConnection,支持 synchronous+asynchronous blocks,支持文件上传,非常简单轻量的封装,值得一试。
Retain Cycle in Blocks
个人笔记,可能会有理解不够透彻而错误。 @fannheyward
Objective-C 是基于引用计数(retainCount)来做内存管理,ClassA 用到 ClassB 的时候,通过 alloc/retain/copy 等将 objectB.retainCount+1,不需要的时候通过 release/autorelease 将 objectB.retainCount-1. retainCount 归零后对象 objectB 被释放。假如 objectA retain objectB,objectB 反过来也 retain objectA,结果就是两者 retainCount 都无法归零,也就没办法被释放,造成内存泄露。这就是 Retain Cycle。
一般情况下注意避免两个对象互相 retain 就不太会出现 Retain Cycle,但是在用到 Blocks 的时候就要小心,很容易造成 Retain Cycle。这是因为 Blocks 会自动 retain 它引用的对象(block 里的对象),稍不留神就造成 Retain Cycle。文档: Object and Block Variables:
When a block is copied, it creates strong references to object variables used within the block. If you use a block within the implementation of a method:
- If you access an instance variable by reference, a strong reference is made to self;
- If you access an instance variable by value, a strong reference is made to the variable.
To override this behavior for a particular object variable, you can mark it with the __block storage type modifier.
MRC
一个简单的例子,Xcode 会报 Retain Cycle warning:
UIImageView *imgView = [[UIImageView alloc] initWithFrame:rect];
[imgView setImageWithURL:url completed:^(UIImage *image, NSError *error, SDImageCacheType cacheType) {
    // ...
    imgView.image = image; // warning: Capturing 'imgView' strongly in this block is likely to lead to a retain cycle
}];
block 也是一个对象,[imgView setImageWithURL:completed:] 的时候 retain 了这个 block;而 block 又自动的 retain 了 imgView,所以就造成了 Retain Cycle。解决方法就是用 __block 告诉 block 不要 retain 引用的对象:
__block UIImageView *imgView = [[UIImageView alloc] initWithFrame:rect];
[imgView setImageWithURL:url completed:^(UIImage *image, NSError *error, SDImageCacheType cacheType) {
    // ...
    imgView.image = image;
}];
还有一种情况,block 里引用的对象是 self 或者 self.property,解决方法同理:
__block MyClass *myClass = self;
operation.completeBlock = ^(NSInteger index) {
    [myClass doOther];
};

self.imgView = [[UIImageView alloc] initWithFrame:rect];
__block UIImageView *tmpView = _imgView;
[_imgView setImageWithURL:url completed:^(UIImage *image, NSError *error, SDImageCacheType cacheType) {
    tmpView.image = image;
}];
}
ARC
在 ARC 下不能用 __block 关键字,取而代之的是 __weak 或者 __unsafe_unretained。其中 __weak 只能 iOS 5+ 使用,__unsafe_unretained 支持 iOS 4。如果 App 不需要考虑 4.x 用 __weak 会更好一些,__weak 修饰的对象释放后会被设置为 nil,而 __unsafe_unretained 会继续指向原来的内存。
__block MyClass *myClass = self;              // MRC
__weak MyClass *myClass = self;               // ARC & iOS 5+
__unsafe_unretained MyClass *myClass = self;  // ARC & iOS 4.
一些参考文章:
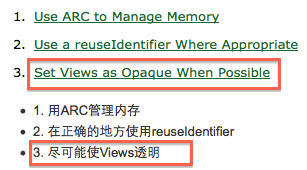
这就是为什么我不喜欢看中文翻译的技术文章
原文: 25 iOS App Performance Tips & Tricks
- Use ARC to Manage Memory
- Use a reuseIdentifier Where Appropriate
- Set Views as Opaque When Possible
- …
翻译版本: iOS应用性能调优的25个建议和技巧
- 用ARC管理内存
- 在正确的地方使用reuseIdentifier
- 尽可能使Views透明
- …
注意看第三条。
技术文看中文翻译版本确实省时省力,但是如果翻译质量不好或者出错的话就会被带到沟里。其实技术文章的词汇非常集中,同一技术点的单词翻来覆去就那几个,多看几篇文档就熟了。
PS:没有一点炫耀英文的意思,大学英语四级 426.
Jawbone UP 2 Review
1 月 31 日开始用已经有两个月,简单记一个评测。
优点:
- 心理暗示作用。为了完成每天的步行目标,真的很愿意去走,比如地铁换乘更乐于走楼梯而不是电梯,以满足自己报表上 100% 完成度的虚荣心。
- 腕带式设计确实很方便携带。除了洗澡,现在几乎是 24 小时不离身,不存在忘带的情况,完全忽视了它的存在。
- 智能闹钟很强大。在指定时间前 30 分钟内从轻度睡眠状态中把人叫醒,起床完全不痛苦,自然醒一般。
- 睡眠质量记录功能。何时上床何时入睡何时醒来,充分了解自己的睡眠。
- 可以互加好友然后激励自己锻炼,不过目前好友间的互动功能还很弱。
- 待机时间可达 7 天以上,极少中断工作。
缺点:
- 手动切换睡眠模式太不方便,很容易忘记,这个月就有三次忘了切换睡眠然后整个睡眠为 0。如果能根据平均上床时间提醒或自动切换睡眠模式可能会更好。
- 手动同步不太方便,好几次都是打开 App 要查看记录才发现还没同步。
- 模式切换的按钮容易坏掉,我这个现在按下的反馈力已经不如全新时干脆,耳机头保护帽容易丢。
- 腕带设计会有误差,推荐非利手佩戴,减少记录误差。
总的来说对 Jawbone UP 2 很满意,使用简单,静默无干扰。可穿戴式设备绝对是下一个爆发点,期待 UP 下一代。
离家的孩子
2013-03-25:
从来没有像这次一样讨厌自己离开家。
第一次送妹妹去学校,妹哭的一塌糊涂。在学校门口我使劲压着泪说学习要努力,妹含泪说不哭,加油。可等我送水杯到宿舍的时候,小姑娘再也没忍住,失控的哭声让我完全没法哄她,我只能抱着等她哭到累才停下。可以有很多理由解释为什么要离开家,可在那一刻,所有的借口都很无力。
你还要继续做一个离家的孩子吗?
iOS Crash Report Service Comparison
实验对比一下现有的 iOS Crash report 服务。包括 Google Analytics(GA), Crashlytics, TestFlight, HockeyApp/QuincyKit/HockeyKit, Crittercism, Bugsense, Flurry.
Google Analytics
- 手动或 CocoaPods 添加库,设置统计 ID,开启 trackUncaughtException,使用很简单。
- Crash 报表比较简陋,可以根据应用版本号、iOS 版本区分,然后根据 crash description 分类,堆栈描述信息比较少,只有 crash 部分栈信息。
- 通过 try-catch 可以有目的性的对 NSException、NSerror 进行捕捉。
- GA 2.0 仍在 beta,稳定性需要验证 。
- 免费。
GA 集成,可以少添加一个库,类似统计的方式做 crash report,crash 信息比较简单,适合简单使用。
Crashlytics
- 相较其他库手动添加或者用 CocoaPods 方式引入,Crashlytics 需要一个软件来集成,刚开始会比较不习惯。按流程走,选中项目,添加 Build Phase-Run Script,添加 framework,设置 APIKey,Done。
- 堆栈信息完善,crash 自动分类,然后作为一个 issue 列出,可以列出 crash 设备信息 (JailBroken, free space, free RAM,屏幕旋转方位,network type 等),这些信息对于 crash 筛选和原因查找会有很大帮助。
- issue 有 open/close 两个状态,方便解决统计。
- 支持 developer team。
- 被动收集,没有主动收集方式。
- crash 邮件报告,支持 Redmine 等第三方服务集成,方便 bug 提交管理。
- 被 Twitter 收购后企业版改为免费。
Crash 信息完善,分类清晰,适合对 crash report 要求比较高的场景使用。
TestFlight
- 手动或 pod 添加,打包上传到 TestFlight,获取 token。使用逻辑比较混乱,先上传 app 才能拿到 token。
- 支持应用分发,feedback,remote logs,Sessions,Checkpoint 等统计功能。
- 单纯 crash 的话使用还比较简单,不需要做特殊处理,其他功能需要针对处理。
- crash 发送好像有点问题,crash 了几次后服务器都没有收到,所以也没法看到 crash 统计。
- 支持 developer team。
- 免费。
看起来功能很多,但是都不够深度,crash report 功能不堪大用。
HockeyApp/QuincyKit/HockeyKit
- pod 添加 SDK,打包上传,获取 token;手动添加流程看起来非常麻烦。
- crash 自动分类,栈信息完整,会把关键信息提炼出来。crash status-Open/Resolved/Ignored。
- 支持应用分发、feedback。
- 支持和第三方 bug tracker 集成。
- HockeyKit、QuincyKit 是开源版本的 HockeyApp,均有客户端和服务端代码,QuincyKit 只有 crash report,HockeyKit 只有应用分发和更新。
- 手动上传 dSYM。
- HockeyApp 收费,免费试用一个月。
简单说就是 TestFlight 加强版,应用分发 + crash report.
Crittercism
- 使用简单,先在网站注册一个应用,获取 token,不需要上传 ipa 到网站。
- 按 crash 原因归类,堆栈信息完整,高亮标明主要信息。crash 报表清晰,可以很明确的查看 crash 历史,设备信息(RAM,iOS version,device,network 等)。
- 支持主动有目的性 exception 收集。
- 支持 crash status(unresolved,resolved,known)。
- 需要手动上传 dSYM,估计是为了 release 下使用。
- 支持 crash alarm,SMS、邮件接收,支持 Uservoice 服务集成。
- 支持 developer team。
- 居然还有一个 rate app alert 功能。。。
- 有免费套餐,专业版支持简单的应用统计。专业版每月活跃用户 100K (per 100k MAU),限制比较大。
- 初创公司,获得风投,和 Crashlytics 气质最像的一个。
功能强大的专业的 crash report 服务。
Bugsense
- 网站注册应用,获取 token。
- 客户端是用 PlCrashReporter 做 crash 收集。
- crash report 可以按 status/App version/OS version 过滤 (付费版)。
- 发送 crash report 的时候可以附带一些自定义数据。
- 有一个比较神奇的功能,Fix Notification,如果某个 crash 已经标记为 resolved 并且新版本已经上线,可以弹窗提醒用户该 crash 已经解决,引导用户去更新升级 (付费版)。
- crash 收集服务被墙。 There are cases where our servers are being blocked due to geographic restrictions (e.g. China).
- 应用应用使用统计,支持 Event 统计
- 免费版限制太多,基本不可用。
相对来说功能比较简单的 crash report 服务。
Flurry
- 网站注册应用,获取 application key。
- 做统计出身,所以 crash report 功能只能算是一个附属功能,crash log 非常简单。
- 免费。
统计服务附带 crash report,功能简单。
小结
- crash report 要求不高且在用 GA/Flurry 统计的话,直接用附带的。
- 需要更为专业详细的 crash report,Crashlytics/Crittercism 二选一。
- 需要应用分发的话上 HockeyApp。
个人倾向于 Crashlytics。原因:
- 内部测试应用分发都比较简单,可以用脚本+内部服务器搞定,比如这个 build.py。
- Crittercism 有 MAU 限制,付费升级到 Premium 也限制 100K MAU。
- Twitter 收了 Crashlytics 后很大方的把企业版免费,开发也在继续。
- Crashlytics 的网站设计更喜欢一些。
NSDateFormatter 返回一年前时间
NSDateFormatter 的一个小陷阱:
NSString *ds = @"2013-03-01 23:55:56";
NSDateFormatter* formatter = [[NSDateFormatter alloc] init];
[formatter setDateFormat:@"YYYY-MM-dd HH:mm:ss"];
NSDate *date1 = [formatter dateFromString:ds];
NSLog(@"date1: %@", date1); //date1: 2012-03-01 15:55:56 +0000
[formatter setDateFormat:@"yyyy-MM-dd HH:mm:ss"];
NSDate *date2 = [formatter dateFromString:ds];
NSLog(@"date2: %@", date2); //date2: 2013-03-01 15:55:56 +0000
格式化以后是一年前的一个时间点,yyyy 指代的就是常规意义上的年,而 YYYY 是 Week of Year, 具体解释参考 Wikipedia: ISO_week_date
iOS 开发文档有相关提示:
It uses yyyy to specify the year component. A common mistake is to use YYYY. yyyy specifies the calendar year whereas YYYY specifies the year (of “Week of Year”), used in the ISO year-week calendar. In most cases, yyyy and YYYY yield the same number, however they may be different. Typically you should use the calendar year.
NSMutableAttributedString Notes
Core Text 针对文本段落支持的样式属性:
typedef CF_ENUM(uint32_t, CTParagraphStyleSpecifier) {
    kCTParagraphStyleSpecifierAlignment = 0,
    kCTParagraphStyleSpecifierFirstLineHeadIndent = 1,
    kCTParagraphStyleSpecifierHeadIndent = 2,
    kCTParagraphStyleSpecifierTailIndent = 3,
    kCTParagraphStyleSpecifierTabStops = 4,
    kCTParagraphStyleSpecifierDefaultTabInterval = 5,
    kCTParagraphStyleSpecifierLineBreakMode = 6,
    kCTParagraphStyleSpecifierLineHeightMultiple = 7,
    kCTParagraphStyleSpecifierMaximumLineHeight = 8,
    kCTParagraphStyleSpecifierMinimumLineHeight = 9,
    kCTParagraphStyleSpecifierLineSpacing = 10, /* deprecated */
    kCTParagraphStyleSpecifierParagraphSpacing = 11,
    kCTParagraphStyleSpecifierParagraphSpacingBefore = 12,
    kCTParagraphStyleSpecifierBaseWritingDirection = 13,
    kCTParagraphStyleSpecifierMaximumLineSpacing = 14,
    kCTParagraphStyleSpecifierMinimumLineSpacing = 15,
    kCTParagraphStyleSpecifierLineSpacingAdjustment = 16,
    kCTParagraphStyleSpecifierLineBoundsOptions = 17,

    kCTParagraphStyleSpecifierCount
};
使用方法:新建一个样式 CTParagraphStyleSetting,设置样式属性和相关值,然后添加到 NSAttributedString.
NSMutableAttributedString *attriStr = [[NSMutableAttributedString alloc] initWithString:string];
// 样式1: 两端对齐
CTTextAlignment alignment = kCTJustifiedTextAlignment;
CTParagraphStyleSetting alignmentStyle;
alignmentStyle.spec = kCTParagraphStyleSpecifierAlignment;//对齐属性
alignmentStyle.valueSize = sizeof(alignment);
alignmentStyle.value = &alignment;

// 样式2:行间距
CGFloat lineSpaceMax = 4.0f;
CTParagraphStyleSetting lineSpaceStyleMax;
lineSpaceStyleMax.spec = kCTParagraphStyleSpecifierMaximumLineSpacing;//最大行间距属性
lineSpaceStyleMax.valueSize = sizeof(lineSpaceMax);
lineSpaceStyleMax.value = &lineSpaceMax;

CGFloat lineSpaceMin = 1.0f;
CTParagraphStyleSetting lineSpaceStyleMin;
lineSpaceStyleMin.spec = kCTParagraphStyleSpecifierMinimumLineSpacing;//最小行间距属性
lineSpaceStyleMin.valueSize = sizeof(lineSpaceMin);
lineSpaceStyleMin.value = &lineSpaceMin;

CGFloat lineSpaceAdjust = 2.0f;
CTParagraphStyleSetting lineSpaceStyleAdjust;
lineSpaceStyleAdjust.spec = kCTParagraphStyleSpecifierLineSpacingAdjustment;
lineSpaceStyleAdjust.valueSize = sizeof(lineSpaceAdjust);
lineSpaceStyleAdjust.value = &lineSpaceAdjust;

// 样式3:最大行高
CGFloat lineHeightMax = 18.0f;
CTParagraphStyleSetting lineHeightMaxStyle;
lineHeightMaxStyle.spec = kCTParagraphStyleSpecifierMaximumLineHeight;//最大行高属性
lineHeightMaxStyle.valueSize = sizeof(lineHeightMax);
lineHeightMaxStyle.value = &lineHeightMax;

// 样式数组
CTParagraphStyleSetting settings[]={
    alignmentStyle, lineSpaceStyleMax, lineSpaceStyleMin, lineSpaceStyleAdjust, lineHeightMaxStyle
};
CTParagraphStyleRef paragraphStyle = CTParagraphStyleCreate(settings, 5);
[attriStr addAttribute:(id)kCTParagraphStyleAttributeName
                 value:(__bridge id)paragraphStyle
                 range:NSMakeRange(0, [attriStr length])];
CFRelease(paragraphStyle);

// Emoji、中文、英文混排
NSDictionary *fontAttributes = @{
    (id)kCTFontFamilyNameAttribute  : @"Helvetica",
    (id)kCTFontCascadeListAttribute : @[
        (__bridge id)CTFontDescriptorCreateWithNameAndSize(CFSTR("AppleColorEmoji"), 0),
        (__bridge id)CTFontDescriptorCreateWithNameAndSize(CFSTR("ZapfDingbatsITC"), 0),
    ]
};
CTFontDescriptorRef descriptor = CTFontDescriptorCreateWithAttributes((__bridge CFDictionaryRef)(fontAttributes));
CTFontRef font = CTFontCreateWithFontDescriptor(descriptor, FONT_SIZE, 0);

[attriStr addAttribute:(id)kCTFontAttributeName
                 value:(__bridge id)font
                 range:NSMakeRange(0, [attriStr length])];
CFRelease(font);

// 字体颜色
[attriStr addAttribute:(id)kCTForegroundColorAttributeName
                 value:(id)FONT_COLOR.CGColor
                 range:NSMakeRange(0, [attriStr length])];